Sunday, January 3, 2016

Happy New Year!

All the best for 2016 for viewers of Collecting QR! And let's start the year with something different: a video. This is how to make a panel for the kitchen area.


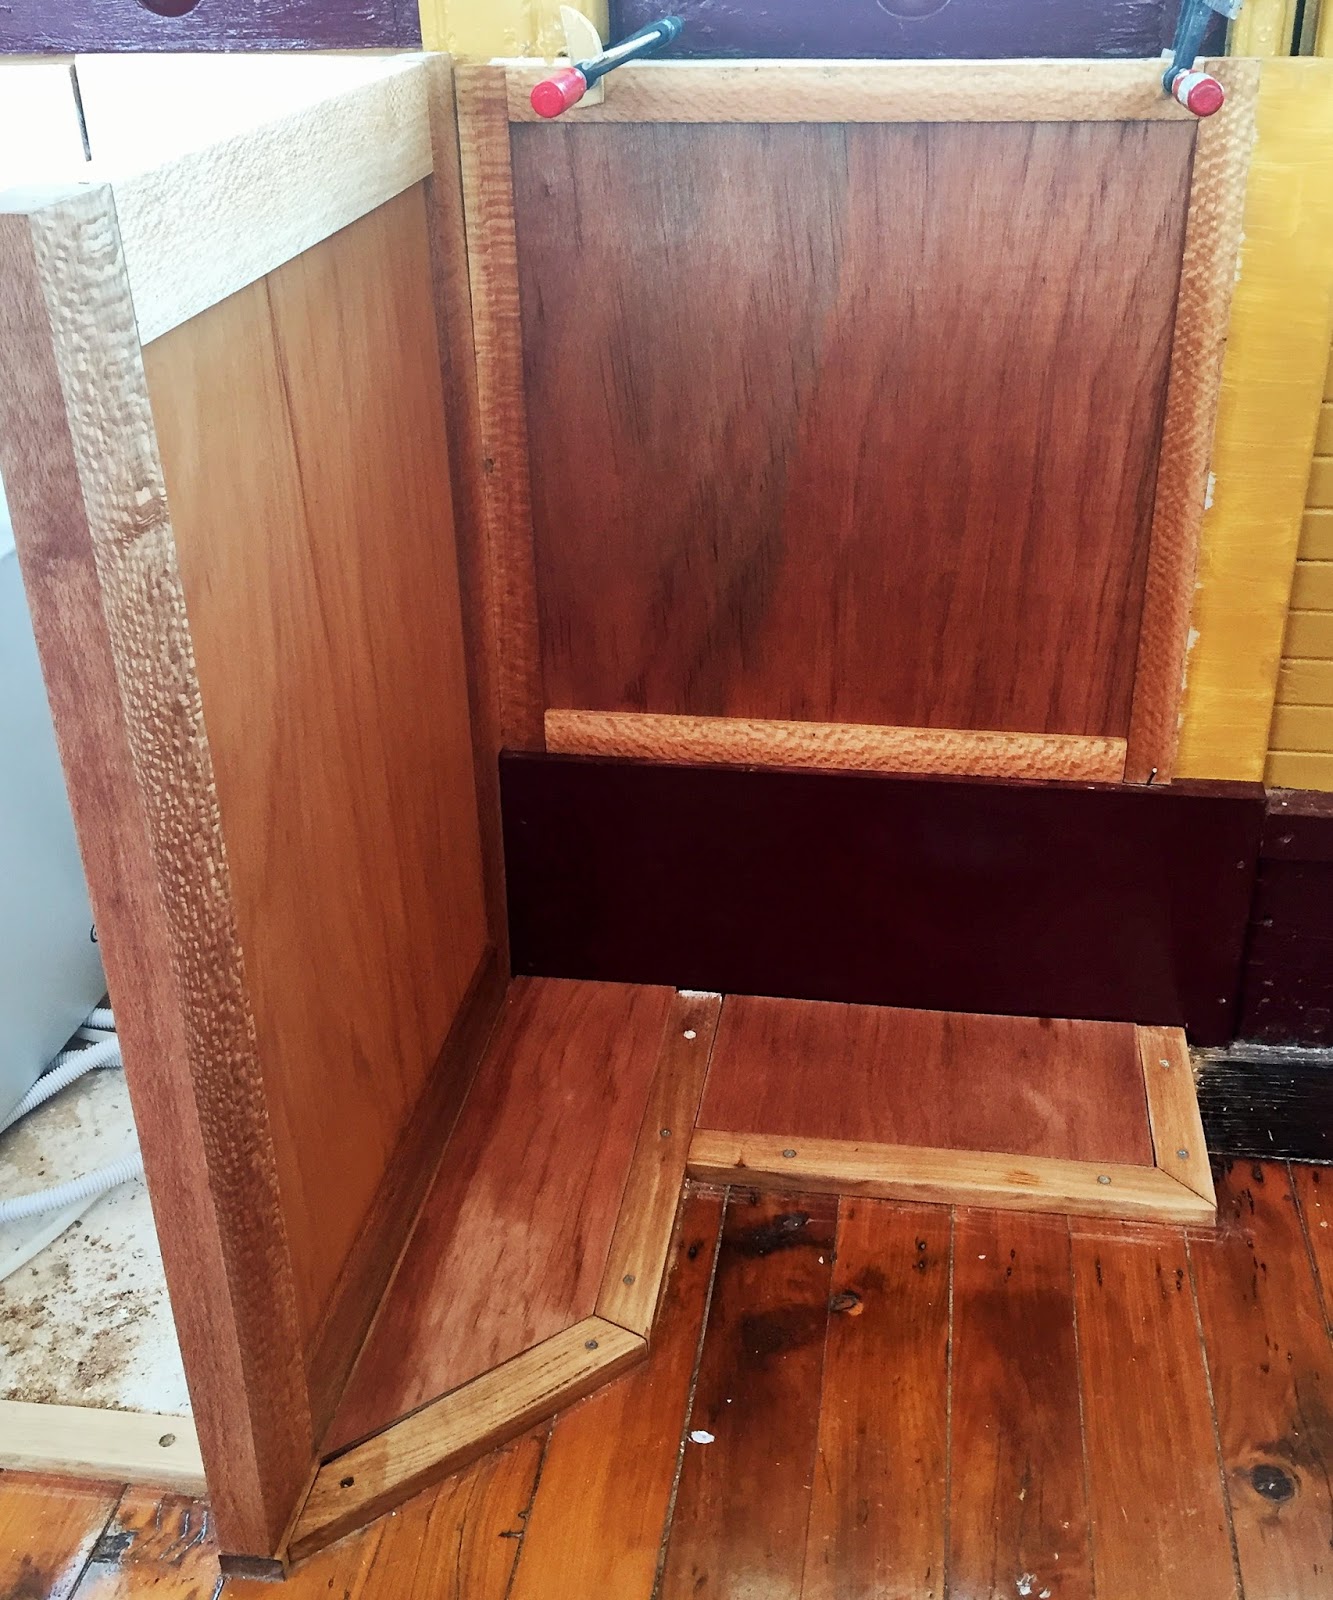
And then, once all glued together, I took the panel out to Clarabelle and fitted it into place.

You can see at the bottom that the panel is about 3mm too wide, to I took it home again and trimmed it.

Still only a test fit, this new panel creates an irregular area for small display shelves.


Sunday, December 13, 2015

Friends for Tea

Я вижу, что число россиян, начали следовать мой блог о восстановлении Clarabelle . Добро пожаловать , ребята, я надеюсь, что это представляет интерес для вас !

Stayed on Clarabelle over night last weekend and the highlight was having some friends over for afternoon tea! I also got some more work done on her, ably assisted by Pallave.

Chester and I were joined by Pallave, Richard, Heidi and Indigo for afternoon tea on board
The perfect opportunity to break out some of that QRR crockery and cutlery!

More work on the seat back support for the splash back, installing one side of the strips that will hold the splash back in place.
And this is why I need a splash back here, save burning dinner's hair or splashing them with boiling fat!

End view showing some of the detail of the beautiful Silky Oak timbers.

Work also continues on the left hand side cupboards

At the conclusion of this week's carpentry I started the varnishing process with a mop down with a very dilute varnish solution.

Still a work in progress but I'm getting there!


Sunday, November 29, 2015

A little more woodwork

It's been over a month since my last post and I have been out to Clarabelle a couple of times since then, not staying long but fiddling about. Yesterday I was there for a couple of hours and managed to install the base and surrounds for the splash-back on the top of the divider between the dining area seat and the stove bench top. All silky oak and coming along nicely!

From the dining area side, trim yet to be added

From the stove/kitchen area side, with added trim!

Sunday, October 18, 2015

Did a little more ...

Sometimes it seems that, the more time I spend out on Clarabelle, the less I actually get done! Last weekend I joined together two bits of wood and slapped some paint around. That's it!

I need a piece of Silky Oak to top the back of the dining area seat as a base for a splashback behind the cook top but I don't have one piece long enough. So I had to join two pieces.

Close up of the lap joint glued and clamped in position.

And I got some top coat on that patch of rot that I sorted out last time. Now I need to scrape the paint off the glass. Again.

While I had the paint out, I slapped some around on the entry door and some adjoining panels.

Sunday, September 27, 2015

Fitting the kitchen


After weeks at home building part of the left hand side kitchen benches, this last weekend I took out my handy work and fitted it in place. I also chased down some more rot on the outside.

I started by sanding off the supports and base plates that I'd installed years ago.

Then I fitted the end wall. It's just standing in position here after two hours of adjusting to assure that it stands straight and level.

I then fitted three pegs to the bottom edge...

... and drilled three holes in the support.
And here she is in place! No fixings needed other than the pegs at the base and a clamp to hold it in place until I build in the rest of the bench around it.

A broader view showing the setting within the carriage.

I also found a bit of rot that I sanded and scrubbed out of a toplight above the kitchen.

A bit of bog and a slap of paint and she's as good as new!


Sunday, September 6, 2015

More woodwork

I did have a run out to Clarabelle on Saturday but ended up just having a kip on board (it is a great place for an afternoon snooze!) and spent some time scraping paint off the windows. But Sunday I did some more woodwork at home.

Last weekend I cut the other three mortise and tenons so here is a first assembly of the frame

I was quite happy with some of the joints ...

... but not so happy with a couple of the others. This soon came good after some adjusting of the joint.

Then I cut slots in the frame to accept the 6mm marine ply panel. I did this on the Triton with three passes of the saw. And that's the panel that the frame pieces are sitting on cut to the right size to fit into the slots

Loose assembly to make sure everything fits, and it did! Subsequent to this picture I pulled it all apart and glued it all together. Currently it's all drying under a picture frame clamp, dead flat and square!


Thursday, August 27, 2015

Woodwork

Last weekend, being a bit cold and horrible, I stayed home and began construction on the kitchen benches for the South side of the kitchen.
First the side pieces, squared off and cut to length and the first drilling for the mortise.

Carefully marked out, I start the mortises with a 2mm drill.

I widen the holes progressively going 2mm a time up to a 10mm drill bit.

Roughing out the mortise using a 10mm drill bit like a router.

Cleaning up the mortise with chisels and a file.

Marking out the overall length and the depth for the tenons on the top and bottom piece.

The top piece cut to length, marking in the complete tenons.

A tenon roughed out using a tenon saw.

The finished tenon smoothed to shape and length using a rasp and file. It's important to take this bit slowly with frequent test fits into the mortise.

The finished joint which could still do with some adjusting but is a pretty good and square fit. Now for three more!